Shopaholic Journey: From Pixel to Homelab
📱 My Pixel Detour
When my Oppo broke, I went for a Google Pixel 6a ($600). Back then, I could’ve gotten a Xiaomi with the same specs for less, but paranoia about Chinese brands (cybersecurity news, spyware fears, etc.) swayed me. Ironically, I’m much more relaxed about it now.
Overall? Solid experience. Smooth browser, no lock-in, Apple-like feel. Only downside is the social sharing gap (no AirDrop).
🖱️ Of Mice, Keyboards & Poly Life
- Initially dreamed of Logitech G502, but I wasn’t gaming.
- Influencers pushed me towards the MX Master 3s + MX Mini combo. Game-changer for productivity. Heavy, professional, premium.
- But too much efficiency = stress. During poly, I toned it down.
💻 Laptop Choices
- Budget: $1.5k from my $3k savings.
- Pick: IdeaPad 514LT7, Intel i7, 16GB RAM, 1TB SSD. Stable but not the best value (Ryzen/Aftershock would’ve been smarter).
- Later flex: ThinkPad X1 Carbon — silky build, perfect with MX Master.
🎮 Dad’s Legion 5
Dad bought a Legion 5 for design. Lucky for me, I could finally game. Steam ran smooth, no more negative FPS like my IdeaPad. Racing in F1 with a GameSir made me get the hype.
🖥️ PC & Homelab Rabbit Hole
Day 1 – $0.50
Before jumping into another device, I had to ask myself: what’s the real purpose of this remote setup?
I already own three laptops, and my Pixel phone alone covers most daily computing needs — solid RAM, camera, storage, and even AI features built right in. Do I really need a fourth machine?
The answer lies in dependability and future-proofing:
- A system that’s always on.
- Flexible enough to expand later.
- Something I can rely on daily, not just another idle gadget.
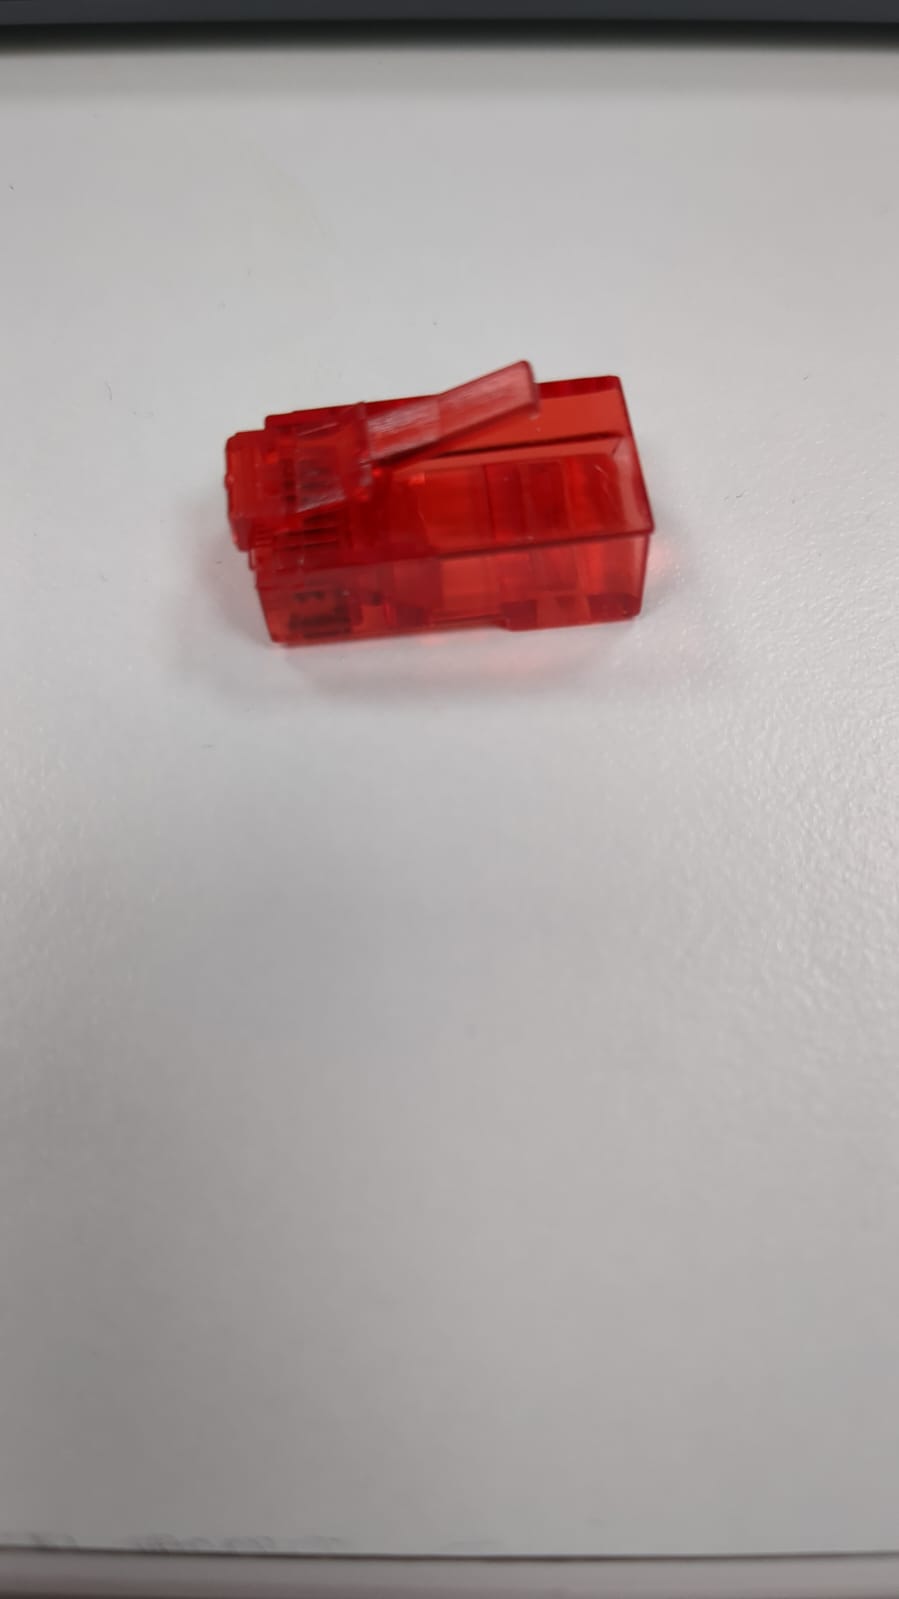
And what’s the first requirement for such a setup? Internet. Preferably a wired connection via RJ45 for stability. So I decided to start small — picking up a bag of RJ45 connectors on Taobao for just $0.50.
A modest beginning, but every setup starts with the basics.
Day 2 – $30.50
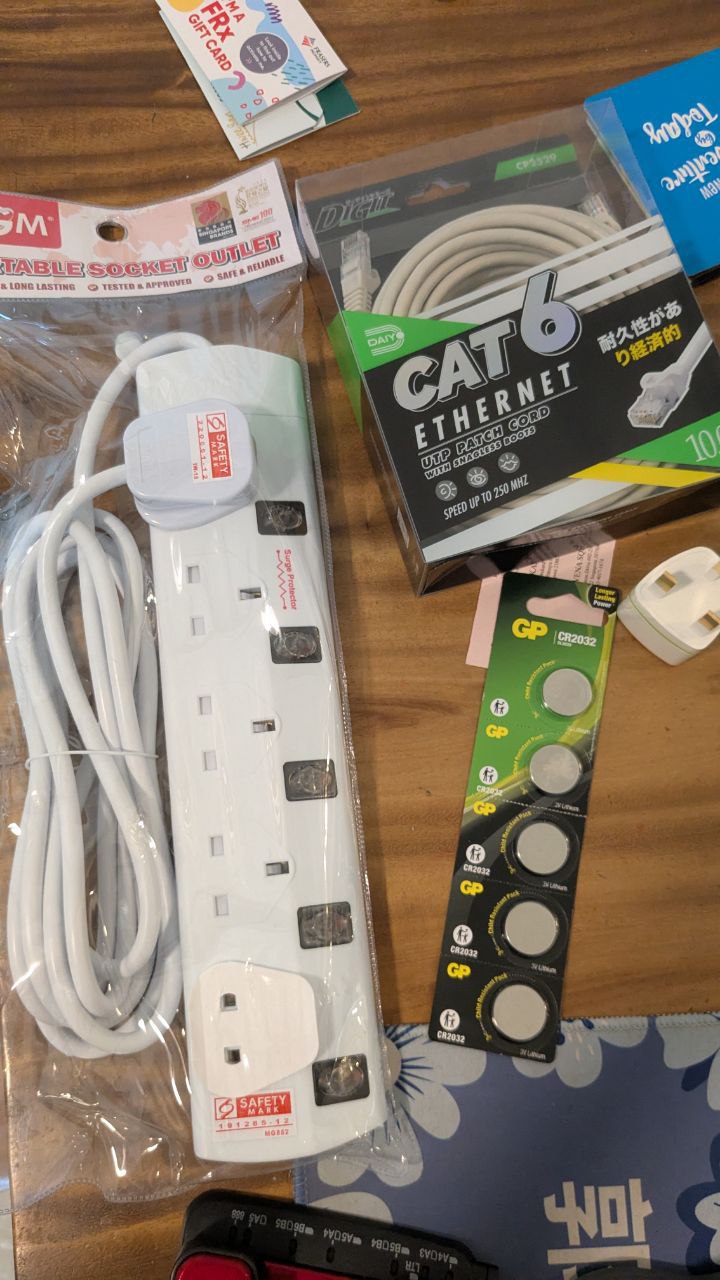
So my house hardware shop was closing down, and there were decent deals available.
- CMOS 2023 battery pack for $5 (Things in singapore are expensive)
- Extention cord for $15
- Cat6 10m wire, enough to crimp to my hearts content $6
- Multi-adapter for future mishaps or poor planning $4 I did a quick survey of where this "Thing" is supposed to be, and ended up decided to use my desk as "The place"
- It's close to my current setup
- It's cooler in my room and wont really disrupt anything elsewhere except myself
- Connect to the only monitor in my house On my wall, I have two wall sockets, and not a whole lot of space to play with.
Day 3 – $600.50
This project is starting to burn the wallet a bit, but here’s the plan. The network flow goes like this: ISP → house modem → repeater → wall → network switch. To make that happen, I picked up:
- TP-Link RE300 Repeater – $100
- ASUS TUF Gaming BE6500 Dual Band WiFi 7 Router – $350
- Huawei HG8240 Series ONT – $100
- D-Link DMS-105 Switch – $20
(I’m not counting mouse, keyboard, or monitor costs here.)
Day 4 – $700.50
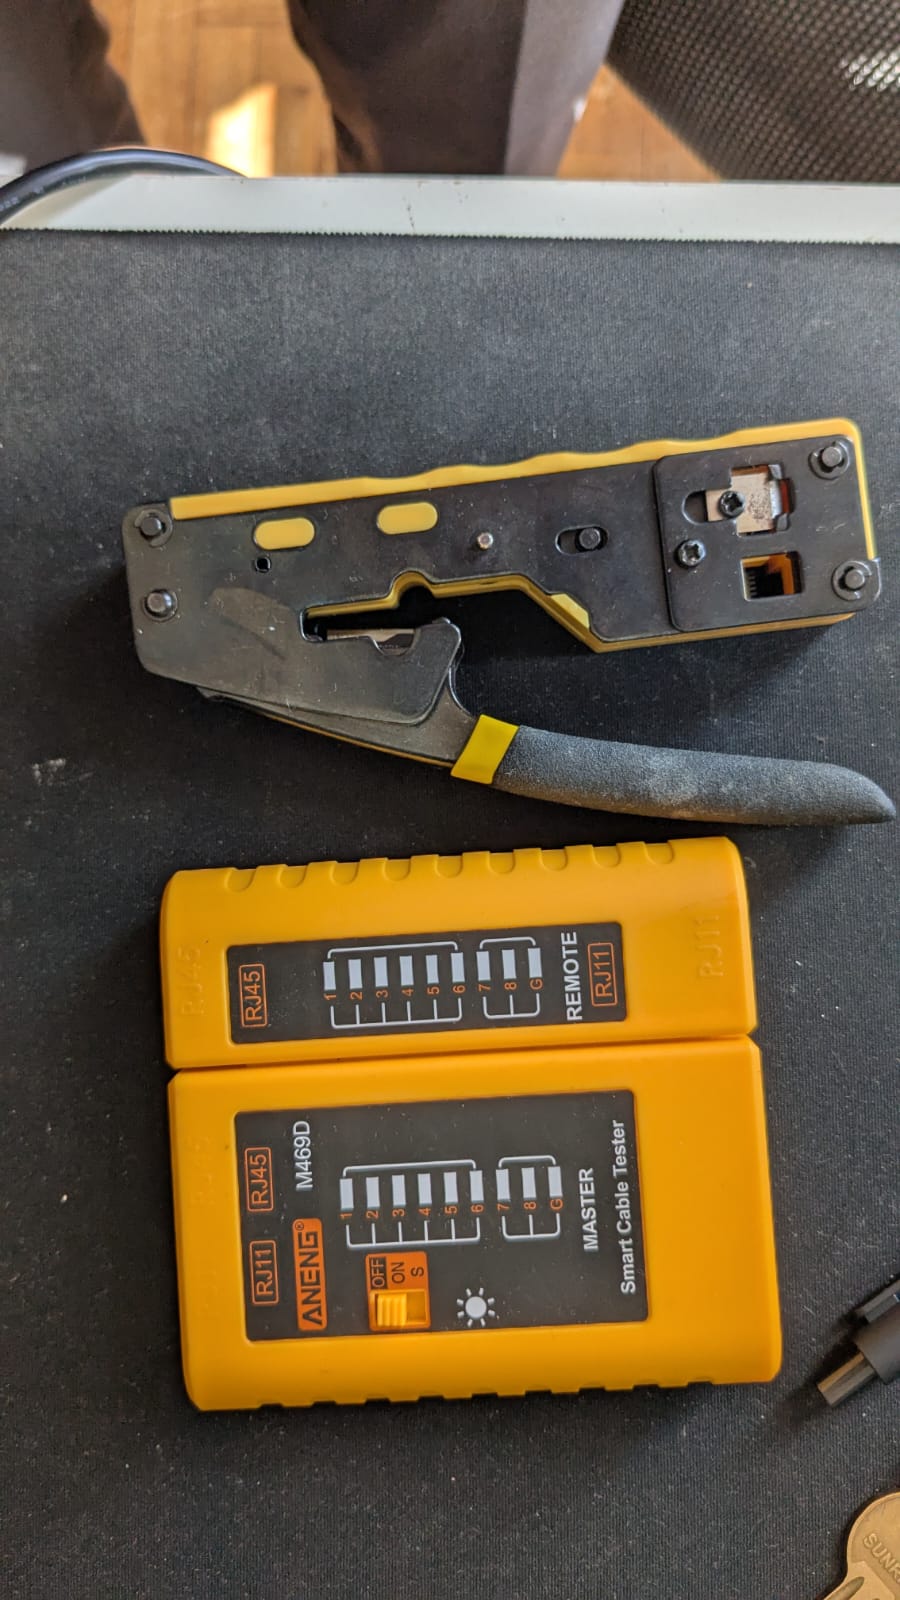
With networking gear sorted, it’s time to get hands-on. I grabbed a crimping tool + testing kit for about $100. This will let me terminate my own Cat6 cables with RJ45 connectors and do some simple network runs.
The target? To have my setup consistently running at 2.5 Gbps.
⚡ Why 2.5 Gbps Became the Sweet Spot
-
Backwards Compatibility with Cat5e
- Works with old wiring without re-cabling.
- Delivers ~2.5× faster speeds with no infrastructure changes.
-
Wi-Fi 6/6E Backhaul
- Modern access points push beyond 1 Gbps.
- 2.5G uplink is the affordable, practical middle ground.
-
Lower Power & Heat
- Easier to cool, better for silent consumer gear and homelabs.
-
Cost Efficiency
- Much cheaper than 5G/10G hardware, but a big jump over 1G.
-
Industry Adoption
- Pushed by the NBASE-T Alliance; widely compatible today.
-
Practical Speeds
- Perfect for SSDs, NAS, and 2 Gbps fiber plans.
- Few home users need more unless doing enterprise work.
✅ In short: 2.5 Gbps is the practical bridge between legacy 1 Gbps and high-end 10 Gbps — affordable, plug-and-play, and more than enough for most homelabs.
Day 5 – $705
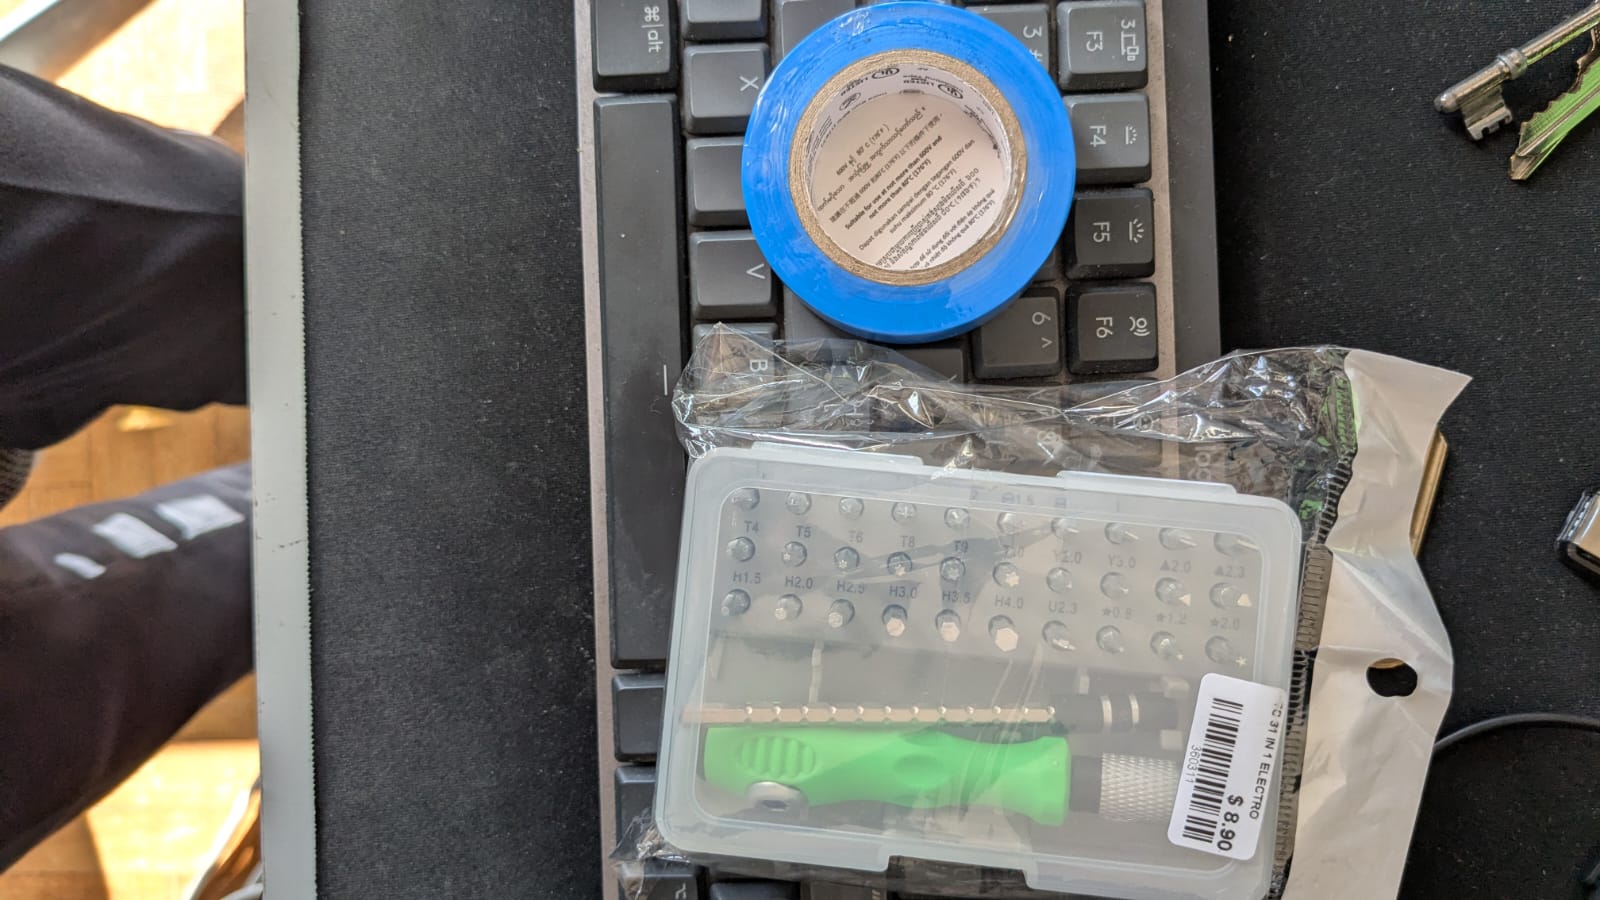
With the hardware store about to close, I made one last quick run:
- $0.50 roll of tape
- $4 screwset (31 pieces) — covers most PC screw sizes.
That brings me to $705 in so far… and still nothing is actually usable yet. Time to start planning for the first real device soon.
Day 6 – $750
I bought some HDMI and Thunderbolt cables, which are always a good investment, and did some research. Well, something I have always wanted is more storage, not counting them into the total cost, I have 4 1 TB Seagate drives lying around. That's when it hit me: I should start with a file server—something lightweight, affordable, and excellent for serving files. Having a server is not it, and neither is a desktop/workstation. And am I really that geeked out to run a Rpi server? Also, I don't have enough spare phones to run this, so I'll have to look into finding a mini-PC for this task. Well there's this brand that I have always liked it's motto that seemed perfect for this job. A small intel pc, with 2gb ports, hdmi and 4 usb would be what I am looking for.
You asked: What’s the story of Trigkey, and what’s their motto?
Company Background
Trigkey is a Chinese mini-PC and computer hardware brand headquartered in Shenzhen, Guangdong. It was founded fairly recently, in 2021, as a sibling brand to Beelink under the same parent compan
They entered the consumer electronics market with a clear focus: crafting compact desktops that enhance office environments while conserving space
Their Motto
While Trigkey doesn’t prominently use a stylized tagline like some brands, their guiding principle is clearly stated as:
"Exploring technology, green life" (sometimes rendered as “discovery technology green life”) This captures their mission to integrate the latest tech into daily life while delivering energy-efficient, high-performance mini PCs.
Vision & Approach
- Their core goal is to manufacture energy-saving devices that retain high performance, striking a balance between efficiency and usability
- Quality control is central to their process—they emphasize documentation, rigorous testing, setting quality standards, and training staff to ensure product reliability while offering competitive pricing
Summary
- Origin: Founded in 2021, based in Shenzhen; a sister brand to Beelink.
- Mission: Build compact desktop PCs to enhance office setups and save space.
- Motto/Concept: “Exploring technology, green life” — blending innovation with energy efficiency.
- Focus: Strong quality control, competitive pricing, and eco-conscious design.
Day 7 – $855
Today marks the start of my actual homelab build with a small NAS system, powered by a Trigkey N100 mini-PC I picked up from Amazon for around $150. It runs on an Intel N100 (4 cores / 4 threads) — very power efficient, but not exactly built for heavy multitasking.
For storage, I’ve set it up with:
- 4 × 1TB HDDs in a RAID 10 array (a balance of performance + redundancy).
- 1 × 500GB HDD mounted separately for lighter, non-critical tasks.
This gives me two mount points:
- RAID 10 → main storage
- 500GB → misc storage
✅ Pros of the Trigkey N100
- Very efficient: ~6–10W idle, ~20W under load.
- Silent & compact: easy to hide on a shelf or corner.
- Low cost entry point into homelabs.
- Great for light services: file storage, Pi-hole, Docker with low concurrency, Nextcloud, etc.
⚠️ Cons of the Trigkey N100
- Only 4c/4t, weak at parallel loads.
- Limited expandability: max 16–32GB RAM, single NVMe slot.
- Not ideal for CPU-heavy work: media transcoding, AI inference, or big DBs.
- Shared resources: RAID I/O can saturate it quickly.
🛠️ Setup Journey
- Installed Ubuntu Server over ethernet, then moved it to WiFi to keep it as an isolated island.
- Connected it back via Tailscale as an edge node.
- Deployed AdGuard to run DHCP and route Tailscale traffic through it.
- Installed Active Directory and enabled an SMB share on the 500GB disk for multi-device access.
- Added Filebrowser, mapped to the RAID 10 array, with a daemon to survive reboots, proxied via ngrok.
- Installed Cockpit for quick phone-based monitoring.
🌡️ Long-Term Reliability Considerations
To make the NAS last, I focused on heat and electricity:
- HDDs spaced apart for better airflow.
- Smaller-capacity disks = less CPU strain, less heat.
- RAID config chosen for balance of redundancy and reduced load on the N100.
- HDDs are cheaper than SSDs — and for now, more cost-effective.
Security-wise, I sandboxed it: endpoint antivirus + IDS/IPS. Worst case, only my $150 NAS gets hit.
With this, my first real homelab node is alive 🎉. It’s not a powerhouse, but it’s a dependable starting point. From here, I can expand and layer more services over time.
Day 7 – $860
Some to give you guys some context here is what raiding means in "My World"
- ⚡ RAID Levels Explained
RAID 0 – Striping
- How it works: Splits data across 2+ drives.
- Pros: Fastest read/write speed, full storage capacity.
- Cons: Zero redundancy — if one drive fails, all data is lost.
- Use case: Temporary scratch disks, gaming, or fast caches where data isn’t critical.
RAID 1 – Mirroring
- How it works: Each drive has an exact copy (2 drives minimum).
- Pros: High redundancy (safe if 1 drive fails), simple to set up.
- Cons: Storage efficiency = 50% (2× 2TB = only 2TB usable).
- Use case: Important small-scale systems (boot drives, business PCs, critical docs).
RAID 5 – Striping + Parity
- How it works: Spreads data across 3+ drives with 1 drive worth of parity.
- Pros: Redundancy with good storage efficiency (~67–80%), decent read speed.
- Cons: Write speed slower (parity calc), rebuilds can stress drives. If 2 drives fail = data loss.
- Use case: Home/SMB NAS where capacity + redundancy are both important.
RAID 6 – Double Parity
- How it works: Like RAID 5, but with 2 drives worth of parity.
- Pros: Survives 2 drive failures. Safer for large arrays.
- Cons: More storage overhead, slower writes.
- Use case: Enterprise NAS, archival storage with many disks.
RAID 10 – Striping + Mirroring
- How it works: Combines RAID 1 and 0 (4+ drives).
- Pros: Fast + redundant, quick rebuilds.
- Cons: 50% efficiency, needs more drives.
- Use case: High-performance setups where uptime + speed both matter (databases, VMs).
Other RAID Levels
- RAID 50/60: Hybrid of RAID 5/6 with striping across groups. Used in big storage arrays.
- JBOD (Just a Bunch of Disks): No RAID, just combines drives into one big volume.
🆚 RAID vs Other Storage Systems
🔹 Unraid
-
How it works: Each drive has its own file system; one or two drives provide parity.
-
Pros:
- Add different-sized disks freely.
- Only parity drives need to be as big as your largest disk.
- If multiple drives fail, you still keep data from unaffected drives.
-
Cons:
- Slower writes (unless using cache SSD).
- Not true RAID performance.
-
Use case: Great for home NAS with mixed disks, media servers, expandable storage.
🔹 TrueNAS (FreeNAS) + ZFS
-
ZFS is both a file system and volume manager with integrated RAID-like features.
-
Pros:
- End-to-end data integrity (checksums, self-healing).
- Advanced RAID options (RAID-Z1, Z2, Z3).
- Snapshots & replication built in.
-
Cons:
- Needs lots of RAM (1GB per TB recommended).
- Complex for beginners.
-
Use case: Rock-solid NAS, business-grade storage, archival, enterprise homelabs.
🔹 ZFS RAID-Z (RAID 5/6 Equivalent)
- RAID-Z1: Like RAID 5 (1 disk parity).
- RAID-Z2: Like RAID 6 (2 disk parity).
- RAID-Z3: Triple parity, very safe but more overhead.
- Benefit: Better at avoiding “RAID write hole” (corruption during rebuild).
Quick Comparison
| System | Expandable | Performance | Fault Tolerance | Best For |
|---|---|---|---|---|
| RAID 0 | No | 🚀🚀🚀 | ❌ None | Speed only |
| RAID 1 | No | 🚀🚀 | ✅ 1drive fail | Small but critical |
| RAID 5 | No | 🚀🚀 | ✅ 1 drive fail | Balanced home NAS |
| RAID 6 | No | 🚀 | ✅ 2 drives fail | Large arrays |
| RAID 10 | No | 🚀🚀🚀 | ✅ 1 per mirror | Fast + safe, but costly |
| Unraid | ✅ Yes | 🚀 (with SSD cache) | ✅ 1–2 drive fail | Flexible mixed disks |
| ZFS/TrueNAS | Limited | 🚀🚀 | ✅ up to 3 drives | Enterprise-grade |
- RAID 0/1/5/6/10 = classic hardware/software RAID, but rigid (all disks should be same size).
- Unraid = flexible, easy to expand with mixed disks, great for homelabs.
- TrueNAS/ZFS = enterprise-level integrity + features, best if you want serious data protection.
I mnted seagate to /mnt, set fstab as service I then forgot about it and added 5 more disks, tried a raid 10, of course, it wouldn't work. I thought the tailscale issue, so I went to "0 superblock". The UUID of the disk surely changes. I then proceeded to make NTFS of it, and it confirmed fail, but Idk why (conflict proc), then I tried sudo reboot cause of tailscale. fstab confirm crash the whole pc. Now remember by tailscale routes through nas a dhcp, so whole lan kenna crash. Now I panic because no lan, no outbound. Then I understood why. Wasted whole day but using raid 5 now waiting for 9.9 sales. Shifted homelab from living room because I have singtel wifi for a reason. Therefore, I transitioned it to a ZFS file system. Spent $5 on a blow brush for dusting off stuff in the future.
Day 8 – $880
⚡ Power, Resilience, and Why a UPS Matters for Your Homelab
When building a homelab or even just a reliable home PC setup, one of the most overlooked components isn’t a CPU or GPU — it’s power protection. Let’s break down why.
🔌 What Is a UPS?
A UPS (Uninterruptible Power Supply) is more than just a fancy power strip. It’s essentially a battery backup combined with power conditioning:
- Battery Backup: Keeps your devices alive for a few minutes (or hours, depending on size) when wall power cuts out. That gives you time to save work, safely shut down, or ride through a short outage.
- Power Conditioning: Filters out spikes, dips, and surges in the incoming electricity so your devices get clean, stable voltage.
Think of it as a shock absorber for your electronics — smoothing the ride between your wall socket and your PC/NAS.
⚠️ Why Wall Power Is “Dirty”
The electricity that comes out of your wall isn’t as perfect as we imagine. It’s considered “dirty” power because it fluctuates due to:
- Voltage spikes (lightning strikes, heavy appliances switching on).
- Brownouts (temporary low voltage during high demand).
- Electrical noise (microwaves, fridges, motors feeding interference into the line).
Your devices might survive these hiccups day-to-day, but over time they degrade power supplies, shorten component lifespan, and corrupt data during outages.
🛡️ What Is Resilience in Computing?
Resilience means your system can continue operating — or at least recover gracefully — even when something goes wrong.
For homelabs, resilience =
- Surviving power outages without corrupting drives.
- Keeping services (NAS, DNS, VMs) running during short blackouts.
- Preventing hardware stress from repeated restarts.
Without resilience, a single power flicker can lead to RAID rebuilds, file system corruption, or even fried components.
💾 How Different Memory/Storage Types React to Power Outages
Not all data lives in the same kind of “memory.” Here’s how each behaves when the lights go out:
1. RAM (Random Access Memory)
- Volatile → Data is lost instantly when power cuts.
- Impact of outage: Open documents, running apps, and in-memory processes vanish.
- Resilience fix: Save frequently, use autosave features, or keep a UPS to avoid sudden shutdowns.
2. HDD (Hard Disk Drive)
- Mechanical platters + read/write heads.
- Impact of outage: If power cuts mid-write, the head may not park properly → data corruption or physical disk damage.
- Resilience fix: UPS allows graceful shutdown and head parking. Journaling file systems (ext4, NTFS) help recover but aren’t perfect.
3. SSD (SATA SSD)
- Flash storage with controller & cache.
- Impact of outage: Incomplete writes can corrupt files or even the translation layer (FAT/metadata). Some drives lose cache data.
- Resilience fix: Enterprise SSDs often include power-loss protection capacitors. For consumer SSDs, a UPS reduces the risk.
4. NVMe SSD
- Same risks as SSD, but faster → more data in flight when power drops.
- Impact of outage: Higher chance of corruption if writes are interrupted.
- Resilience fix: UPS or capacitors in high-end drives.
5. VRAM (GPU Memory)
- Like RAM, it’s volatile.
- Impact of outage: No long-term risk, but you lose whatever was being processed (e.g., rendering, AI inference).
- Resilience fix: UPS is only relevant if you need GPUs to finish jobs cleanly.
📝 Putting It Together
- RAM/VRAM → volatile, always wiped during outages.
- HDD/SSD/NVMe → non-volatile, but can get corrupted mid-write.
- UPS = protects against both data loss (by giving you time to save/flush writes) and hardware stress (by filtering dirty power).
✅ TL;DR
A UPS isn’t a luxury — it’s a resilience enabler.
- Wall power is unstable (“dirty”), which wears down electronics.
- A UPS keeps your system alive during outages, giving you time to save data and shut down cleanly.
- RAM and VRAM lose data instantly, while HDDs/SSDs/NVMes risk corruption without proper shutdown.
If you value your homelab, NAS, or even just your main PC, a UPS is one of the smartest investments you can make.
Eaton is considered one of the better UPS brands because it blends enterprise-grade reliability, pure sine wave output, better efficiency, and longer warranties, often at competitive pricing. APC remains the popular household brand, but Eaton is the go-to when you want something that feels closer to datacenter quality for your homelab or critical devices.
After the scare that was yesterday, I decided to buy a ups as well for future proofing of devices for shorter downtimes. $20
Day 9 – $1,350
Ironwolf pro 18tb $470
Why I Chose Seagate (IronWolf Pro) for My NAS — and Why 18TB Is the Sweet Spot
I’ve been slowly shaping my homelab into something I can actually rely on day-to-day. The heart of it is a NAS I first stood up on a Trigkey N100: low power, quiet, and perfect for learning. I started with mixed HDDs (RAID10 + a separate 500 GB volume), then set my sights on proper NAS-grade drives as I scale capacity.
Before the choice, I had to clarify the tech:
CMR vs SMR vs HAMR (super short)
- CMR (Conventional Magnetic Recording): non-overlapping tracks → consistent writes, great for RAID/NAS.
- SMR (Shingled Magnetic Recording): overlapping tracks → higher density but slower/random writes; rebuilds can be painful.
- HAMR (Heat-Assisted Magnetic Recording): laser-assisted writes for ultra-high capacities; exciting, but newer and pricier.
For a NAS that will rebuild, scrub, and serve mixed workloads, CMR is the safe, boring, and correct choice.
So… why Seagate, specifically?
I went with Seagate IronWolf Pro because it hits the NAS checklist without drama:
- All-CMR in this tier: No surprise SMR models sneaking into arrays that need steady random writes and clean rebuilds.
- NAS-tuned firmware (AgileArray): Optimised for multi-bay vibration, RAID behaviour, and quick error handling—exactly what you want during rebuilds.
- Vibration & 24/7 ratings: Built for always-on enclosures; RV sensors and higher endurance/workload ratings than typical desktop drives.
- IronWolf Health Management: Extra telemetry/health hooks (works best with popular NAS OSes), useful for pre-fail warnings.
- Rescue Data Recovery (often included for a couple of years): Not a plan to fail, but a real backstop if the worst happens.
- Availability & value: In SG, IronWolf Pro is easy to source, frequently discounted, and price/TB is competitive versus other NAS lines.
Bottom line: Seagate’s IronWolf Pro gives me predictable CMR performance, NAS-specific features, and better guardrails if something goes sideways—exactly what I want when my array is rebuilding at 3 AM.
Why 18 TB is my current sweet spot
I picked up 18 TB at ~S$24/TB — and here’s why that capacity makes sense:
- Best value curve right now: Below 16 TB, $/TB is usually worse; above 18–20 TB, you start paying early-adopter tax.
- CMR + sanity: Many 18 TB SKUs are CMR, so I get NAS-friendly behaviour without stepping into newer HAMR pricing.
- Rebuild risk vs time: Bigger drives mean longer rebuilds (and higher second-failure risk). 18 TB is still manageable compared to 20–22 TB, especially on modest CPUs like my N100.
- Planning headroom: With 18 TB units, even a small 3-bay gives real, future-proof capacity (and I can still move to ZFS RAIDZ2 later if I expand).
My setup story (the short version)
- Compute: Trigkey N100 NAS (quiet, ~6–20 W), later pairing with beefier nodes (Evo X1) for heavier tasks.
- Disks: Moving from a learning RAID10 to IronWolf Pro as I consolidate and scale.
- Network: Targeting 2.5 GbE as the practical sweet spot—works on existing cabling, cheap NICs/switches, fast enough for SSD-backed shares.
- Power: Lining up an Eaton UPS so rebuilds and writes survive brownouts (From clean shutdowns to corrupted arrays).
If you’re building similar: pick CMR for NAS, lean into IronWolf Pro for the NAS-specific perks and recovery safety net, and don’t sleep on 18 TB while the price curve is friendly. Your future self (and your rebuild times) will thank you.
Day 10 – $1,360
Picked up a Maiwo HDD enclosure for $10. This was honestly the hardest decision so far — there are just so many brands, so many form factors, and endless “future-proof” options. But at the end of the day, I decided to stay practical: who really needs more than 30 TB of local data in a home setup, especially when I still use cloud services?
🗂️ Different Ways to Store & Use HDDs
When it comes to spinning disks, there isn’t a single “right” way — it all depends on your budget, use case, and how much resilience you want:
🔹 NAS (Network Attached Storage)
- A purpose-built enclosure with its own OS (Synology, QNAP, or DIY TrueNAS).
- Provides redundancy (RAID/ZFS), network sharing, snapshots, and remote access.
- Best for always-on home or office setups where multiple users/devices need reliable storage.
🔹 Dedicated Mini PC as a NAS
- Using a small PC (like my Trigkey N100 or Evo X1) with Linux/TrueNAS/Unraid.
- More flexible: can run extra services (Docker, VMs) alongside storage.
- Slightly more complex than a consumer NAS, but better value and customizable.
🔹 Docking Stations
- A “toaster-style” dock where you slot in bare drives (single or dual bay).
- Great for quick backups, cloning, or temporary access.
- Not designed for 24/7 uptime — drives are exposed, no cooling, limited redundancy.
🔹 Open Drive Arrays (JBOD / DIY Racks)
- Barebone chassis or open trays holding multiple drives.
- Often paired with a dedicated controller card or HBA.
- Cheaper and highly expandable, but requires manual configuration (RAID, cooling, power).
🔹 Direct Wire Connection
- Plugging bare drives directly into a motherboard or via SATA-to-USB adapters.
- Cheap, quick, but messy and fragile for long-term use.
- Good for data recovery or one-time migrations, not as primary storage.
🔹 External Enclosures
- Like my Maiwo: sealed cases (single or multi-bay) that connect via USB-C, Thunderbolt, or eSATA.
- Protects drives, adds cooling, and makes them portable.
- Ideal balance for individuals who don’t want a full NAS but still need reliable storage expansion.
🌀 S2D vs. Ceph vs. vSAN – A Quick Guide to Distributed Storage
When you scale storage beyond a single box, you enter the world of distributed storage systems. Three big names often come up: Microsoft S2D (Storage Spaces Direct), Ceph, and VMware vSAN. They all serve the same purpose — pooling disks across multiple servers into one resilient storage fabric — but they do it in different ways.
🔹 Storage Spaces Direct (S2D)
- What it is: Microsoft’s software-defined storage built into Windows Server Datacenter.
- How it works: Pools local disks across Windows cluster nodes, presenting them as highly available storage volumes. Uses ReFS/NTFS plus SMB3 for data access.
- Why people choose it:
- Deep integration with Windows ecosystem (Hyper-V, Active Directory).
- Easy to manage with Windows Admin Center.
- Licensing often bundled with Datacenter edition.
🔹 Ceph
- What it is: Open-source, massively scalable distributed storage system.
- How it works: Uses RADOS (Reliable Autonomic Distributed Object Store) to spread objects across nodes with replication or erasure coding. Exposes storage as block (RBD), object (S3/Swift), or file (CephFS).
- Why people choose it:
- Flexibility + scale — runs on commodity hardware, scales to petabytes.
- Widely used in OpenStack, Kubernetes, and homelabs.
- Open-source community with lots of tunability.
🔹 VMware vSAN
- What it is: VMware’s hyper-converged storage solution.
- How it works: Aggregates local disks of ESXi hosts into a shared datastore managed at the hypervisor layer. Uses VMware clustering & DRS for performance and resilience.
- Why people choose it:
- Tight integration with VMware vSphere.
- Single-pane-of-glass management for compute + storage.
- Certified hardware = predictable performance.
⚖️ Key Differences
| Feature | S2D (Microsoft) | Ceph (Open-Source) | vSAN (VMware) |
|---|---|---|---|
| Ecosystem | Windows only | Linux/open-source | VMware ESXi |
| Scalability | Moderate (dozens of nodes) | Massive (1000s of nodes) | High (hundreds of nodes) |
| Cost | Windows licensing | Free (hardware + ops cost) | VMware licensing (expensive) |
| Flexibility | Limited (Windows stack) | Very high (block, file, object) | Limited (VMware only) |
| Best Use Case | Windows shops | Cloud-style storage | VMware shops |
Distributed storage relies on multiple servers (nodes) working together. To maintain consistency and reliability, the system needs consensus — an agreement between nodes about the current state of the data.
Without consensus, you risk:
- Split-brain scenarios: Two nodes think they own the “truth” → data divergence.
- Silent corruption: Writes acknowledged by one node but not replicated.
- Inconsistent recovery: After failures, nodes disagree on which version of the data is valid.
How consensus is achieved
- Quorums: Majority of nodes must agree before a write is considered committed.
- Algorithms: Paxos, Raft, and variations (Ceph uses CRUSH maps + monitors, vSAN/S2D use quorum + witness nodes).
- Purpose: Ensures that even if some nodes fail, the cluster agrees on the single, correct version of data.
File systems are one of those things we all use daily but rarely stop to compare. Here’s a blog-style comparison of common ones:
📂 File Systems Explained: Object, NTFS, ext, ext4, and More
When data sits on disk, it isn’t just “raw bits” — it’s organized by a file system. Different file systems are designed with different trade-offs in mind: performance, reliability, compatibility, and features.
🔹 Object Storage
-
What it is: Instead of files/folders, data is stored as objects with metadata + a unique ID.
-
Examples: Amazon S3, Ceph Object, OpenStack Swift, MinIO.
-
Pros:
- Infinitely scalable.
- Great for cloud-native apps, backups, streaming media.
- Metadata-rich (useful for search + AI).
-
Cons:
- High latency compared to local file systems.
- Not optimized for small, random reads/writes.
-
Best use: Cloud storage, big data, backups, content delivery.
🔹 FAT / FAT32 (File Allocation Table)
-
What it is: Early Microsoft system, still used for USB drives.
-
Pros:
- Universally compatible (works on almost every OS/device).
-
Cons:
- Max file size = 4 GB.
- Max volume = 8 TB (with tweaks).
- No journaling (higher risk of corruption).
-
Best use: Small removable drives, cross-platform transfers.
🔹 NTFS (New Technology File System)
-
What it is: Default for Windows since Windows XP.
-
Pros:
- Journaling for crash recovery.
- Permissions, compression, encryption (EFS), quotas.
- Large file/volume support.
-
Cons:
- Windows-centric (Linux/macOS support is partial).
- More overhead compared to simpler FS.
-
Best use: Windows desktops, servers, external drives in Windows environments.
🔹 ext (Extended File System Family)
-
ext2:
- Early Linux file system.
- Lightweight, no journaling (faster, but risky).
- Still used for SD cards, boot partitions.
-
ext3:
- Adds journaling → safer than ext2.
- Backward compatible.
- Now mostly obsolete.
-
ext4 (default for modern Linux):
- Journaling, extents (faster for large files).
- Supports files up to 16 TB and volumes up to 1 EB.
- Stable, reliable, good performance.
-
Best use: Linux desktops, servers, NAS.
🔹 XFS
-
What it is: High-performance journaling file system from SGI.
-
Pros:
- Great at handling large files and parallel I/O.
- Scales well for enterprise servers.
-
Cons:
- Slower at lots of tiny files.
- Limited shrinking support.
-
Best use: Linux enterprise servers, media servers, databases.
🔹 Btrfs (B-tree FS)
-
What it is: Modern Linux FS with copy-on-write (CoW).
-
Pros:
- Snapshots, checksums, compression, subvolumes.
- RAID support built-in.
-
Cons:
- Some features still experimental under heavy enterprise loads.
-
Best use: Advanced Linux servers, self-healing storage, homelabs.
🔹 ZFS
-
What it is: File system + volume manager, designed by Sun Microsystems.
-
Pros:
- End-to-end checksumming (self-healing).
- Snapshots, cloning, compression, encryption.
- RAID-Z support built-in.
-
Cons:
- High memory usage (beyond
1 Gbpsrule of thumb:1 GB RAM per 1 TB storage). - Complex.
- High memory usage (beyond
-
Best use: NAS, mission-critical servers, archival.
📊 Quick Comparison
| File System | OS Ecosystem | Journaling | Max File Size | Best Use Case |
|---|---|---|---|---|
| **Object Storage** | Cloud-native | N/A | Virtually unlimited | Scalable backups, cloud apps |
| **FAT32** | Universal | ❌ | 4 GB | USBs, cross-device |
| **NTFS** | Windows | ✅ | 16 TB | Windows PCs/servers |
| **ext2/3** | Linux | ext2 ❌, ext3 ✅ | 2–16 TB | Legacy Linux, boot |
| **ext4** | Linux | ✅ | 16 TB | Default Linux FS |
| **XFS** | Linux | ✅ | 8 EB | Large files, media |
| **Btrfs** | Linux | ✅ (CoW) | 16 EB | Snapshots, homelabs |
| **ZFS** | Cross-platform | ✅ (checksums) | 16 EB | NAS, enterprise |
🗂️ File Systems and How They Interact with RAID, ZFS, and Unraid
When you put multiple drives together, you need both a storage strategy (RAID, Unraid, ZFS) and a file system (ext4, NTFS, etc.). They work at different layers:
- RAID/Unraid/ZFS → decides how disks are combined (striped, mirrored, parity, object store).
- File system → decides how files are organized on top (journaling, snapshots, metadata).
🔹 Classic RAID (0/1/5/6/10) + File Systems
- Traditional RAID is handled by hardware controllers or software RAID (mdadm in Linux).
- Once the array is created, you format it with a file system like ext4, NTFS, or XFS.
- The file system is unaware it’s running on a RAID — it just sees one “big disk.”
Example:
- Linux NAS → RAID 10 via
mdadm→ formatted with ext4. - Windows Server → RAID 5 on hardware → formatted with NTFS.
✅ Good for: Simple, predictable setups. ⚠️ Limitations: RAID doesn’t protect against silent corruption; it only handles drive failure.
🔹 ZFS (Integrated FS + RAID)
- ZFS is both a file system and volume manager.
- It has its own RAID-like layers (RAID-Z1, RAID-Z2, etc.), no need for separate RAID.
- Built-in features:
- End-to-end checksumming (detects + corrects corruption).
- Snapshots and cloning.
- Compression and deduplication.
✅ Good for: Data integrity, enterprise NAS, archival. ⚠️ Limitations: High RAM requirement (rule of thumb: 1 GB RAM per 1 TB storage).
Why people love ZFS: If you write a file, ZFS can verify later that it hasn’t silently corrupted — something RAID + ext4/NTFS can’t guarantee.
🔹 Unraid (Flexible Array + File System Choice)
- Unlike RAID, Unraid stores each disk with its own file system (commonly XFS, sometimes Btrfs).
- Parity is calculated separately, not striping across all disks.
- This means:
- You can mix and match disk sizes.
- If multiple disks fail, the unaffected disks are still readable individually.
✅ Good for: Homelabs, mixed drives, expandable storage. ⚠️ Limitations: Slower writes unless you use an SSD cache; not as fast as RAID10 or ZFS.
Why file system choice matters in Unraid:
- XFS = stable, simple, high performance.
- Btrfs = snapshots, CoW, but heavier and less mature under constant RAID stress.
🔹 How ext4, NTFS, XFS, Btrfs fit in
- ext4: Default Linux FS; reliable choice for software RAID arrays.
- NTFS: Windows-only; common for hardware RAID on Windows servers.
- XFS: Strong performance with large files, used in many NAS distros (e.g., Unraid).
- Btrfs: Modern Linux FS with built-in RAID features, but less robust than ZFS.
📊 At a Glance
| Approach | Handles RAID | File System(s) Used | Strengths | Weaknesses |
|---|---|---|---|---|
| **Classic RAID** | Separate (HW/SW) | ext4, NTFS, XFS | Simple, familiar | No corruption checks |
| **ZFS** | Integrated | ZFS (only) | Data integrity, snapshots | RAM-hungry |
| **Unraid** | Flexible, per-disk | XFS, Btrfs | Mix sizes, easy recovery | Slower writes |
| **Btrfs RAID** | Integrated | Btrfs | Snapshots, CoW | Not as proven as ZFS |
When I started my homelab on the Trigkey N100, I knew storage would be the heart of it. I had five HDDs on hand, so I went with a RAID 10 setup for balance — decent performance and redundancy, without overloading the N100’s modest CPU.
🔹 Why ext4 Made Sense (for Now)
I formatted my RAID 10 array with ext4, the Linux default. It’s:
- Lightweight and reliable.
- Well-supported across every distro.
- Easy to recover with standard Linux tools.
For a beginner-friendly NAS build, ext4 just works.
⚠️ Limitation: ext4 doesn’t detect silent corruption. If a bit flips on disk, RAID won’t catch it, and ext4 won’t notice until it’s too late.
🔹 When I Might Want ZFS
Down the road, I see myself moving to ZFS when I add bigger disks (like the 18TB IronWolf Pro I’m eyeing). Why?
- Data integrity: End-to-end checksums mean I’ll know if files silently corrupt.
- Snapshots & cloning: Perfect for testing, backups, or rolling back a bad config.
- RAID-Z: Safer rebuilds compared to mdadm RAID 5/6.
⚠️ Trade-off: ZFS eats RAM (rule of thumb: 1 GB RAM per 1 TB of storage). My N100 can’t handle it gracefully, so I’d need to run ZFS on a beefier box (like my Evo X1 or a future node).
🔹 Why Not Unraid (Yet)
Unraid is tempting, especially since I’ve collected a mix of drive sizes. Its flexibility — letting each disk keep its own file system (usually XFS) with parity on top — is attractive.
- I could add drives one by one, no need for identical sizes.
- If two drives fail, the rest are still mountable individually.
- Easy to expand as my homelab grows.
⚠️ Limitation: Unraid isn’t as fast for writes unless you use SSD cache. Since I’m running on budget gear and want consistent speeds, I stuck with RAID10 for now.
🔹 Where Btrfs Fits In
Some NAS distros default to Btrfs for snapshots and CoW (copy-on-write). But it’s still not as mature as ZFS in heavy RAID use. For my setup, ext4 is simpler and safer.
That said, I might experiment with Btrfs on smaller pools or SSDs later, especially for snapshotting configs.
✅ My Homelab Storage Journey (So Far)
- Today: Trigkey N100 → 4×1TB RAID10 → formatted with ext4.
- Next step: Expand with IronWolf Pro drives, consider migrating to ZFS on Evo X1 for integrity + snapshots.
- Future option: Try Unraid when I start mixing odd drive sizes or want per-disk flexibility.
👉 In short: ext4 fits my current lightweight NAS, but as my homelab grows, ZFS will protect my bigger investments, and Unraid may be my playground for flexibility.
Day 11 – $1,960
Today was a big spend day: I picked up 2 × Lexar 870 SSDs for $600. It felt like a leap, but it’s an investment in reliability and efficiency for where my homelab is headed.
🔹 Why Lexar Over Samsung 990?
Most people default to Samsung NVMe drives like the 980/990 series because of speed benchmarks. But for a homelab — especially one that might evolve into an AI-focused system — raw speed isn’t everything.
- Power efficiency: Lexar SSDs are tuned for lower idle and sustained power draw. For 24/7 systems like NAS or Unraid arrays, that translates into cooler temps and less wasted energy.
- Reliability under load: Unlike ultra-high-performance consumer NVMes (e.g., Samsung 990 Pro) that chase peak speeds, Lexar focuses on consistent sustained performance. That matters more for AI datasets and NAS workloads, where stability is king.
- Value-oriented design: Lexar drives tend to offer a better balance of endurance (TBW) and cost, making them attractive for longer-term deployments where drives will constantly read/write.
🔹 Storage Philosophy – What Belongs Where
Not all data deserves the same type of storage. Here’s how I’m planning mine:
-
HDDs (IronWolf Pro, etc.):
- Great for bulk data — movies, backups, archival, cold storage.
- Cheap per TB, but slower and fragile under sudden power loss.
-
SATA SSDs (like Lexar 870):
- Best for NAS caches, VM storage, system volumes.
- Much faster than HDDs, but without the heat/noise of NVMe.
-
NVMe SSDs (Samsung 980/990, etc.):
- Best for scratch space, AI model training, database indexing.
- Incredible speed, but higher heat and power draw.
-
VRAM (GPU memory):
- Used for AI inference and rendering.
- Ephemeral — wiped on power loss, but essential for real-time workloads.
🔹 Why Lexar Works Well with Unraid
Unraid thrives on mixing different drives, and Lexar SSDs slot in perfectly:
- As a cache drive, they buffer fast writes before moving them to slower HDD arrays.
- As a VM/dockers pool, they provide reliable low-latency storage for apps, databases, or AI containers.
- Their efficiency means less stress on UPS runtime in case of power outages — important for homelab resilience.
🔹 The Values Behind Lexar
Lexar has always branded itself around reliability, accessibility, and endurance. Unlike consumer gaming SSDs that market maximum read/write speeds, Lexar’s pitch is:
- Consistent performance over flashy peaks.
- Durability for 24/7 use cases.
- Affordable pro-grade hardware for creators, engineers, and homelab enthusiasts.
For me, those values align with what I want: a setup that runs quiet, cool, and stable while I experiment with NAS, AI inference, and Unraid services.
🔹 Why It Matters for AI
AI workloads thrive on predictability — the ability to stream datasets in and out of storage without bottlenecks or overheating. Lexar SSDs:
- Provide stable I/O throughput, reducing training/inference hiccups.
- Save energy, which matters when GPUs are already consuming most of the power budget.
- Fit well in edge-AI setups or small servers where efficiency matters.
Day 12 – $2,980—Evo X1 Joins the Homelab
Today was a milestone—I invested $1,020 into upgrading my setup with the GMKtec Evo X1 mini PC. (Roughly US 800) + Future $50 rebate from a cashback program
What Makes the Evo X1 Shine:
- AMD Ryzen AI 9 HX 370 APU – 12 cores, 24 threads, and turbo up to 5.1 GHz.
- Integrated Radeon 890M GPU – 16 compute units, decent for light graphics and compact workloads
- 64 GB onboard LPDDR5X (8,000 MHz) — seriously healthy for homelab multitasking
- 1 TB PCIe 4.0 NVMe SSD, with dual M.2 slots (expandable up to 8 TB)
- Connectivity: Dual 2.5 GbE, Wi-Fi 6, USB4, triple 8K display outputs (HDMI 2.1, DP 2.1), and Oculink — so it’s future-ready
- Smart cooling & power modes, with Quiet (35 W), Balance (54 W), and Performance (65 W) presets, plus VRAM allocation option
Why GMKtec? The Backstory & Why Evo X1 is a Smart Pick for Homelabs
GMKtec—based in Shenzhen—is quietly delivering mini PCs with serious compute power, especially for AI development. The Evo X1 stands out in their lineup as a capable, compact workhorse. It’s designed for enthusiasts and creators who need robust performance in a small form factor.
Priced under $1,000 before shipping, it’s a notable bargain compared to bigger desktops or upgraded laptops Its high price-to-performance ranking in your spreadsheet validates that it punches well above its weight.
How It Fits into My Homelab
I’m using the Evo X1 as the new compute backbone of the homelab:
- 64 GB RAM and PCIe 4.0 storage make it ideal for running Unraid VMs, Docker stacks, AI workloads, and home automation services.
- Multiple high-speed ports (2.5 GbE, USB4, m.2, Oculink) give flexibility for NAS expansion, high-speed networking, or eGPU additions.
- Performance tuning (quiet/performance modes) lets me balance noise, power, and thermal limits depending on use.
Basically, it’s like moving from a reliable but modest car (my N100) into a sleek performance EV (Evo X1)—more power when I need it, but still efficient and easy to place.
Quick Recap Table
| Attribute | Details |
|---|---|
| **Price Paid** | \$1,020 |
| **CPU** | AMD Ryzen AI 9 HX 370 (12c/24t) |
| **RAM** | 64 GB LPDDR5X |
| **Storage** | 1 TB PCIe 4.0 NVMe + dual M.2 expandability |
| **Connectivity** | 2.5 GbE ×2, Wi-Fi 6, USB4, Oculink, HDMI, DP |
| **Modes** | Quiet (35 W) / Balanced (54 W) / Performance (65 W) |
| **Why Bought** | Excellent price-to-performance value, AI-capable, compact |
Day 13 – $2,980 Freebie
$0 Gold-plated Ethernet Patch Cable Scrolling through Shopee today, I stumbled upon one of those quirky deals that make online bargain-hunting fun. A gold-plated Cat 8 SFTP Ethernet cable—rated 40Gbps, 2000MHz—for just $5, effectively free after applying a $5 off voucher. Not bad for a piece of kit that ensures a rock-solid connection when you’re moving big datasets or streaming at low latency. I also poked around some voucher-earning games for extra discounts, though the real temptation of the day wasn’t a cable—it was the thought of finally pulling the trigger on a CUDA-based GPU.
Why NVIDIA CUDA Still Reigns Supreme
When it comes to AI workloads, not all GPUs are created equal. Yes, there are competitors like Cambricon (China’s AI accelerators), AMD ROCm, and Intel GPUs, but NVIDIA CUDA GPUs remain the gold standard for developers, researchers, and even hobbyists.
Here’s why:
-
CUDA Ecosystem & Libraries
- CUDA (Compute Unified Device Architecture) is more than hardware—it’s a mature software stack.
- Frameworks like TensorFlow, PyTorch, MXNet have deep CUDA support.
- NVIDIA’s cuDNN, TensorRT, and RAPIDS provide ready-to-use optimizations. Competitors simply can’t match the breadth of libraries and community support.
-
Developer Community & Stability
- Tens of thousands of tutorials, GitHub repos, and Stack Overflow threads exist for CUDA.
- AMD’s ROCm is improving, but driver stability and ecosystem maturity remain weak points.
- Cambricon is niche (mainly in Chinese data centers), and Intel GPUs are still finding their place.
-
Hardware Features
- CUDA GPUs integrate Tensor Cores (for AI matrix math), RT Cores (for rendering), and highly optimized memory pipelines.
- NVIDIA has long experience in balancing FP32, FP16, INT8, and now FP8 precision, making training and inference faster and more power-efficient.
What Specs to Look Out For in an AI GPU
When shopping for a CUDA-capable GPU, raw teraflops aren’t the only metric. Consider these:
- CUDA Core Count → More cores = more parallel compute.
- Tensor Core Support → Crucial for deep learning (introduced in Volta → improved in Ampere, Hopper, Blackwell).
- VRAM Size & Bandwidth → For large models, 16GB+ is recommended; HBM memory is a big plus.
- PCIe vs NVLink → For scaling beyond one GPU, interconnect speed matters.
- Power Efficiency → Newer architectures (like Ada Lovelace & Blackwell) deliver more performance per watt.
Enter Blackwell: NVIDIA’s Next Big Leap
If Hopper (H100) was NVIDIA’s answer to AI’s explosive growth, then Blackwell (B100/B200) is the evolution for the next era:
- Built on a custom TSMC 4N process with cutting-edge packaging.
- FP4 precision support for ultra-efficient AI inference.
- Next-gen NVLink (900 GB/s+) for massive multi-GPU training.
- More Tensor Cores per SM, boosting both training throughput and inference speed.
- Targeted squarely at AI hyperscalers, LLMs, and generative AI workloads.
In short, Blackwell isn’t just about more speed—it’s about redefining scalability and efficiency in AI compute.
Final Thoughts
Today I scored a practically free Ethernet cable, but the real takeaway is this: while cables and vouchers are fun, the GPU choice is what shapes the future of any AI project. NVIDIA CUDA GPUs continue to dominate because of their software ecosystem, community support, and forward-looking architectures like Blackwell.
Whether it’s tinkering with older cards like the GT 640 or GT 730 I have lying around, or dreaming of the power of a future 5070 Ti or even a B200 Blackwell, one truth stands: in AI, the right GPU isn’t just hardware—it’s the gateway into an entire ecosystem.
Day 14 – $2,980 2nd Freebie
Today’s “freebie hunt” on Shopee landed me yet another useful cable — a $0 HDMI cable after vouchers. Between yesterday’s Cat 8 Ethernet and today’s HDMI, I think my collection of wires is reaching “mission complete.” But that got me thinking: I’ve got all the cables for displays and networking… what about something more exotic, like hooking up an Oculink cable to a GPU?
What is Oculink?
Oculink (SFF-8612/8611) is a compact cable standard developed by PCI-SIG. It’s designed to carry PCIe lanes directly, without the overhead of additional protocols. Think of it as a slimmed-down PCIe extension cable that’s perfect for compact PCs, servers, and eGPU builds.
Why Oculink Helps vs Thunderbolt
- Direct PCIe link → Oculink carries PCIe 4.0 ×4 directly, giving ~8 GB/s of raw bandwidth. Thunderbolt 3/4, while capable of 40 Gbps, has protocol overhead that reduces effective PCIe bandwidth (usually PCIe 3.0 ×4, ~3.5 GB/s).
- Lower latency → Since Oculink doesn’t wrap PCIe traffic inside Thunderbolt protocol layers, communication between CPU ↔ GPU is faster.
- Cheaper → Oculink risers and cables cost a fraction of Thunderbolt enclosures.
- Simplicity → No extra chipset required; it’s a straight shot PCIe tunnel.
In short: Thunderbolt is great for plug-and-play universality, but Oculink is better for raw GPU performance and cost-effectiveness.
Connecting Oculink to a GPU
There are several ways to connect Oculink to a desktop GPU:
-
Oculink-to-PCIe Riser Board (Budget Option)
- Cable plugs into riser/dock → PCIe x16 slot.
- Needs 24-pin ATX + GPU PCIe power.
- Most flexible, cheapest.
-
Oculink-to-M.2 Adapter
- Converts an NVMe slot into Oculink.
- Great for laptops and mini-PCs.
-
Thunderbolt-to-Oculink Hybrids
- Convert Thunderbolt into Oculink.
- Useful if your host only supports Thunderbolt, but pricier.
-
Direct Oculink GPU Boxes
- Purpose-built GPU enclosures.
- Sleek but often expensive.
Other eGPU Models & Docks
- ADGP1 → Oculink dock, but not CUDA-capable. Best for display, not compute.
- AG01 → Compact dock, but very limited supply.
- DEG1 → Requires a separate PSU. By the time you buy cables + power, the value disappears.
- Premium Thunderbolt eGPUs (Razer Core, AORUS Gaming Box, Sonnet Breakaway Box) → Complete packages with PSU + cooling, but very expensive ($300–$500 without GPU).
Why Budget Adapters Are Usually Enough
- Oculink risers deliver full PCIe 4.0 ×4 bandwidth — same as premium boxes.
- Latency is lower than Thunderbolt enclosures.
- At ~$30, they’re a fraction of the cost.
Unless you need polished hot-plug support, a riser + good PSU is all you really need.
Why People Choose Thermalright PSUs
Pairing an Oculink riser with a reliable PSU is the best way to stabilize an eGPU build. Thermalright PSUs stand out because:
- ATX 3.1 & PCIe 5.1 ready → native 12VHPWR cables for RTX 40/50 GPUs.
- 80+ Gold efficiency → stable voltage and cooler operation.
- Fully modular → no clutter, only use the cables you need.
- Strong reputation → known for cooling and rock-solid stability.
Final Thoughts
A free HDMI cable today reminded me that while I’ve got the basics covered, the real leap comes from connecting GPUs externally. Oculink offers a clean, direct PCIe link that outperforms Thunderbolt in speed, latency, and price. While premium eGPU boxes look sleek, the budget Oculink riser + Thermalright PSU combo remains the smartest, most reliable path for anyone experimenting with external CUDA power.
Day 15 – $3,000 Last Freebie and a Disappointment
Today’s “haul” ended up being a mixed bag. I scored a $0 dust blower ball (those squeeze bulbs that puff air to clean electronics), but my real buy — a $60 Eaton UPS 5A (1200VA/650W) — never showed up. Lost in transit, refunded, but still a disappointment. Backup power is critical, so I’ll grab another later.
Thinking about resilience got me reflecting on something similar in the network world: how we expose and secure our services. That led me to port forwarding, tunnels, and Tailscale.
Cloudflare Tunnels, ngrok, and Tailscale
If you’ve ever tried to run an app from home, you’ve probably looked at Cloudflare Tunnels or ngrok. Here’s how they stack up against Tailscale Funnel:
Cloudflare Tunnels
- Strength: Extremely polished for exposing web apps to the public internet. Comes with DDoS protection, custom domains, SSL, and Cloudflare’s massive global edge network.
- Limitation: Works best for HTTP/HTTPS services. Anything beyond web traffic requires more setup. You’re still trusting a third-party edge for routing.
ngrok
- Strength: Great for developers. Instant, temporary public URLs to demo apps, APIs, or webhooks.
- Limitation: Free tier is restrictive (random URLs, session timeouts). Not meant for always-on homelabs.
Tailscale Funnel
- Strength: Not just for web apps — it exposes services directly from your private mesh VPN. TLS and identity-based ACLs are built in. Funnel integrates smoothly with your existing Tailnet.
- Limitation: Still newer than Cloudflare Tunnels; less “enterprise edge features” but more homelab-friendly.
👉 In practice:
- Cloudflare Tunnels = best if you’re running a blog, portfolio, or service for the public internet.
- ngrok = best for short-term developer demos.
- Tailscale Funnel = best for homelabs, because you get LAN-like access + optional external access, all identity-secured.
That’s why hobbyists and self-hosters lean heavily toward Tailscale — it replaces clunky port forwarding and adds VPN functionality for free.
Using Tailscale Traffic Routing for the Whole Network
One of Tailscale’s most underrated features is exit nodes and subnet routing. This lets a single machine act like a gateway for your entire LAN.
For example, your Intel N100 box could serve as:
- DHCP server → assigning IPs to every device on your network.
- AD/DNS server → running Samba/Active Directory for authentication.
- Tailscale exit node → routing all your LAN’s internet traffic through it.
- Subnet router → exposing your LAN devices to your Tailnet, even if they don’t run Tailscale.
Feasibility
-
The N100 has low power draw but plenty of performance for routing, DNS, and AD roles.
-
Tailscale’s routing features would let you:
- Access printers, NAS boxes, IoT devices from anywhere, without port forwarding.
- Route all traffic through the N100 for unified filtering, logging, or even ad-blocking (Pi-hole style).
-
Firewall need is reduced: ACLs + central monitoring give you identity-aware rules at the VPN layer, not just IP-based filtering.
In other words: your N100 could effectively become the router + domain controller + VPN concentrator for your entire network. All while staying simple to manage.
Final Thoughts
Today I lost a UPS, but I gained perspective: just like hardware redundancy, network resilience is about architecture, not just devices.
- Cloudflare Tunnels and ngrok are great for specific use cases, but Tailscale shines for homelabs.
- It replaces port forwarding, acts as a secure VPN, and with Funnel, it even handles public hosting.
- With features like exit nodes and subnet routing, even a small N100 box can graduate into being your LAN’s DHCP, DNS/AD, and secure gateway.
Instead of opening ports and hardening firewalls, you simply extend your LAN securely with Tailscale. That’s why so many homelabbers choose it: it feels like networking reimagined for the personal era of cloud-native.
Day 16 – $3,150 I Am Big Fan of Yours
Today’s build upgrades were all about power, cooling, and connectivity. I picked up a $2 PWM hub to manage fans, a $100 Thermalright KG750 PSU for stable power, and a $48 Oculink dock with cable to slot in another GPU. The theme here? Keeping things tidy, cool, and efficient — because if there’s one thing I’ve learned, it’s that messy wires and poor cooling kill performance, especially when you start stacking drives.
Cooling: More Than Just Fans
When people think cooling, they usually think of CPU or GPU temps. But drives — especially HDDs and enterprise SSDs — also generate heat that can shorten lifespan if ignored.
- HDDs → run best at 30–40°C. Too hot and you risk head crashes, too cold and lubrication stiffens.
- SSDs → NVMe drives can easily hit 70°C+ under sustained load, causing throttling.
This is where a PWM hub shines. Instead of plugging fans randomly into the motherboard, the hub centralizes control:
- Dynamic speed scaling → fans ramp up only when temps rise.
- Targeted airflow → you can point fans across drive cages or M.2 heatsinks.
- Cable reduction → fewer messy wires snaking around, improving airflow further.
In short: proper fan control isn’t just about silence — it’s about giving drives the airflow they need, only when they need it.
Wires: The Hidden Cooling Factor
Messy cables do more than look bad — they block airflow. Optimizing wires is almost free performance:
- Use modular PSUs (like the Thermalright KG750) → only plug in the cables you actually need.
- Route SATA and power cables behind the tray → reduces clutter near drives.
- Shorter cables for Oculink/PCIe risers → less mess, fewer bends, and cleaner airflow.
- Bundle with Velcro straps instead of zipties → easier to reconfigure when adding drives.
A clean wiring job doesn’t just make you proud when you peek inside — it directly improves thermals by giving fans unobstructed paths.
Drives: Getting the Most from Cooling + Wires
With multiple drives, heat builds fast. Here’s how to optimize:
-
Stacking HDDs
- Always leave a small gap if possible.
- Position a low-RPM 120mm/140mm fan to blow directly across them.
-
NVMe SSDs
- Use heatsinks or thermal pads if they’re bare.
- Avoid cramming multiple drives under a single heatsink without airflow.
-
External GPU/Drive setups via Oculink
- Oculink docks add flexibility, but don’t forget they still need cooling.
- Keep GPU/drive risers in open airflow paths, not buried in cable jungles.
-
- Monitor temps
- Tools like
smartctl, CrystalDiskInfo, or even NAS dashboards let you track drive health. - If drives creep past 50°C, airflow needs adjustment.
Final Thoughts
Today’s upgrades — a PWM hub, Thermalright PSU, and Oculink dock — might not sound flashy, but they’re the foundation of a system that runs cool and clean. Optimizing cooling and wires isn’t just about aesthetics; it directly affects drive longevity, performance stability, and serviceability.
In the end, it’s simple: drives want consistent airflow, GPUs want clean power, and your sanity wants tidy cables. Nail those three, and you’ll get a rig that’s quiet, efficient, and ready to scale without cooking your data.
Day 17 – $3,500 I Am Poor
Well, it happened. I blew the budget and ended this whole run with an RTX 5060 Ti. Wallet says “I am poor,” but the mind says, “time to train and serve some models.” Naturally, my first stop will be LM Studio — running large language models locally. The challenge: getting the most out of CPU, NPU, and GPU together without melting hardware or drowning in memory errors.
CPU, NPU, GPU: Who Does What in LM Studio?
- CPU (Central Processing Unit) → Orchestrates data flow, token batching, and fallback inference.
- NPU (Neural Processing Unit) → Efficient for low-power inference (newer Intel/ARM chips), but limited ecosystem.
- GPU (Graphics Processing Unit) → The star of the show for AI. CUDA + Tensor Cores handle matrix math at scale, but VRAM limits how big a model you can run.
LM Studio can flexibly assign workloads, making it possible to use each processor where it excels.
Reducing Model Size
Big models choke hardware unless optimized. Techniques include:
- Quantization (8-bit, 4-bit) → Shrinks model memory use dramatically.
- Pruning → Trims unimportant weights for efficiency.
- LoRA adapters → Lightweight fine-tunes without ballooning model size.
- CPU/GPU offloading → Offload non-critical layers to RAM when VRAM is tight.
Why VRAM Matters in AI Serving
VRAM is the GPU’s working memory:
- 7B model, FP16 → ~14 GB.
- 7B, 4-bit quantized → ~4 GB.
- 13B, FP16 → ~26 GB.
- 13B, 4-bit quantized → ~8 GB.
With the RTX 5060 Ti’s 12 GB VRAM, quantized 13B models are still possible, but you’ll need offloading to system RAM or SSD. In practice:
- 7B quantized models → run comfortably.
- 13B quantized → fits, but tight (expect occasional RAM/SSD swaps).
- 34B+ models → only feasible with heavy offloading.
Once VRAM is exceeded, the GPU constantly swaps data to system RAM — introducing slowdowns.
Storage: Why an Efficient SSD Like the Lexar NM790 Helps
This is where a fast, efficient SSD comes in. The Lexar NM790 4TB is a great example:
- High endurance & low power draw → Keeps heat low and power bills friendly, perfect for always-on AI rigs.
- PCIe Gen 4 NVMe speeds (up to 7400 MB/s read) → Rapidly streams model weights into VRAM.
- Large capacity (4 TB) → Enough room for dozens of quantized GGUF models, LoRA adapters, and datasets.
- Consistency under load → Unlike cheap DRAM-less drives, the NM790 maintains speed during long model loads and swaps.
For LM Studio, this means:
- Faster model load times (no waiting minutes to boot a 13B).
- Smoother CPU/GPU offloading, since paging data from SSD is far quicker than from a slow drive.
- Room to store multiple versions of models (7B, 13B, 34B) and experiment without constant shuffling.
An efficient SSD becomes the bridge between system RAM and GPU VRAM — minimizing bottlenecks when models don’t fit fully in VRAM.
Blackwell: The Next Frontier
NVIDIA’s upcoming Blackwell GPUs are designed with this exact ecosystem in mind:
- FP4/FP8 precision → Shrinks model memory needs even further.
- Larger VRAM pools → For consumer cards, more GDDR; for enterprise, HBM stacks.
- Next-gen Tensor Cores → Optimized for transformers and quantized inference.
- Efficiency → More performance per watt, critical for long AI sessions.
Together with fast NVMe storage and smarter software frameworks, Blackwell will push local AI even further.
1. RTX 5060 Ti vs 5070 Ti (AI workloads)
| Spec | RTX 5060 Ti | RTX 5070 Ti | AI Impact |
|---|---|---|---|
| VRAM | **12 GB GDDR6** | **16 GB GDDR6X** | More VRAM = run bigger models without offloading. 16 GB lets you fit quantized 13B models fully in GPU; 12 GB often needs SSD/RAM offload. |
| Memory Bus | 192-bit | 256-bit | Wider bus = higher memory bandwidth, helps in graphics and some AI, but not as critical as VRAM size for LLM inference. |
| Bandwidth | \~432 GB/s | \~672 GB/s | Better for games/rendering; in AI, bandwidth helps but isn’t the bottleneck unless running at FP16/full precision. |
| CUDA Cores | Fewer (mid-tier) | More (upper-mid) | More parallelism = faster throughput. |
| Typical Wattage | \~200W | \~250W | 5070 Ti runs hotter and draws more power. |
| Price (est.) | Cheaper, more accessible | Higher upfront cost | 5070 Ti gives more headroom for future-proofing. |
2. Why VRAM matters more Bus Size (for value in AI)
-
VRAM determines capacity, i.e., what models you can run at all.
- 7B → fits in both 12 GB and 16 GB.
- 13B quantized → fits cleanly in 16 GB, but may struggle in 12 GB.
- 34B → possible only with heavy offloading on both, but easier with 16 GB.
-
Bus size = bandwidth, i.e., how fast data moves between GPU core and VRAM.
- Important for gaming/rendering (textures, frames per second).
- For LLM inference, models are read sequentially from VRAM. Once weights are in VRAM, the GPU does mostly compute (matrix multiplies).
- So bus width gives some uplift, but not nearly as much impact as having enough VRAM in the first place.
-
Cost vs benefit:
- Paying extra for bus width helps mostly with graphics workloads.
- Paying extra for VRAM lets you jump to the next model tier (e.g., 13B vs 7B), which directly changes what’s possible in LM Studio.
- That’s why you’d value the 5070 Ti: not for the 256-bit bus, but for the 16 GB VRAM.
✅ In AI inference: VRAM = capacity ceiling. Bus width = performance polish.
Final Thoughts
$3,500 later, I’m broke but grinning with an RTX 5060 Ti humming in my setup. The lesson here: running AI locally is about more than just the GPU. It’s about balancing CPU/NPU/GPU roles, reducing model size smartly, having enough VRAM to breathe, and pairing it all with a reliable SSD like the Lexar NM790 4TB to keep data flowing.
Blackwell may change the game again, but with the right mix of quantization, VRAM, and SSD speed, local AI is already within reach for homelabbers like us.
Day 18 – $4,700 An Old Friend
$1,200, Old Laptop
Five years ago, I picked up an IdeaPad 514LT7—an Intel i7 laptop with 16GB of RAM and a 1TB SSD. At the time, it was a beast for a student, and I definitely didn’t hold back. I pushed it hard: dozens of Chrome tabs, spinning up virtual machines for Kali Linux and RHEL, and juggling multiple school projects at once. Naturally, the wear and tear came quickly.
Eventually, Windows became unbearable to run on it. I swapped it for Ubuntu as my main drive, which worked fine for about five months before it too started struggling. During my final year projects, I riced it with Arch Linux for the fun of it, but one by one, the hardware began to give way. First the Wi-Fi and Bluetooth modules, and then the performance dips.
Instead of letting it collect dust, I decided to put the laptop back to work.
Repurposing Into a Server
I flashed Ubuntu Server onto it, installed Tailscale for easy networking, and slotted it into my setup. Since my UPS and switch ports were already fully occupied, I connected it via USB 3.0 to Ethernet. Surprisingly, it ran decently and found a second life—not as a daily driver laptop, but as a Coolify server for hosting my personal projects.
What is Coolify?
For those unfamiliar, Coolify is an open-source, self-hostable alternative to platforms like Heroku or Netlify. Think of it as a PaaS (Platform-as-a-Service) that you own. Instead of relying on third-party cloud providers to deploy your apps, Coolify gives you a web-based dashboard to:
- Deploy Dockerized apps with just a few clicks
- Manage databases and services (Postgres, Redis, etc.)
- Set up domains and SSL automatically
- Monitor logs and server health
All without needing to manually mess with docker-compose files every single time.
Why Host on Coolify?
While I could have just run my apps with Docker manually, Coolify makes self-hosting far more manageable. It reduces the friction of deployment, especially for side projects and experiments. A few reasons it’s perfect for my repurposed laptop:
- Ease of Use – The web UI abstracts away the repetitive DevOps work.
- Self-Ownership – I control the server, the apps, and the data. No lock-in.
- Resource Friendly – Even with older hardware, Coolify can efficiently run multiple apps without overloading the system.
- Free & Open-Source – Ideal for someone like me who wants cloud-like convenience without recurring costs.
What used to be a laptop gasping for life under Windows is now quietly humming as a lightweight PaaS server.
Closing Thoughts
There’s a certain satisfaction in breathing new life into old hardware. Instead of throwing away a five-year-old laptop, I turned it into something genuinely useful for my workflow. With Coolify, I get the best of both worlds: the fun of self-hosting, and the convenience of modern deployment.
Sometimes, an old friend just needs a new role.
Day 19 – $4,830 A Failed Hackathon
$130, Raspberry Pi 5 (8GB)
As usual, I was browsing Reddit and drooling over all the cool cluster projects people were building with Raspberry Pis. The idea of creating my own little cluster was too tempting to resist—I definitely needed to get my hands on one. At first, I was sold on the LattePanda series. The specs looked exactly like what I wanted, and I was ready to make it my next purchase.
And then my phone rang.
A new hackathon had just opened for registration: SUTD What the Hack. It was a hardware-focused competition, sponsored by ESP32. Sounded like fun… until we actually started building.
Working with the ESP32 was frustrating. We bounced from trying an NVIDIA Jetson Xavier, back down to an ESP32, then over to an RPi. The constant back-and-forth left us exhausted, and in the end, our project collapsed. We failed the hackathon—horribly.
But not everything was wasted. That experience made me appreciate something I had overlooked: just how much easier it is to work with a Raspberry Pi 5 compared to most other hardware.
Why Raspberry Pi 5 Shines for AI Edge Computing
The Raspberry Pi 5 is more than just a cheap single-board computer—it’s a sweet spot for AI edge projects. Here’s why:
1. Plug-and-Play Ecosystem
Unlike the ESP32, which requires custom toolchains and lots of low-level setup, the RPi 5 feels like a regular computer. Flash an OS, plug in peripherals, and you’re up and running. For hackathons or rapid prototyping, that’s priceless.
2. Solid Performance at Low Power
With its quad-core ARM Cortex-A76 CPU running up to 2.4GHz and 8GB of RAM, the Pi 5 can handle surprisingly heavy workloads. It’s not a Jetson Xavier powerhouse, but for lightweight AI inference (think image recognition, voice models, or anomaly detection), it’s more than enough—without burning through watts or budget.
3. GPU + AI Acceleration Options
Out of the box, the Pi 5 has a capable VideoCore VII GPU. But where it really shines is compatibility: you can add accelerators like the Google Coral USB TPU or Intel’s Neural Compute Stick 2. This means you can offload neural network inference for edge AI tasks without needing expensive boards.
4. Massive Community Support
AI and ML tutorials for the Pi are everywhere. Whether it’s TensorFlow Lite, PyTorch Mobile, or OpenCV, there’s likely a community-tested guide for running it on a Pi. That’s something Jetson and LattePanda just can’t match in terms of beginner-friendliness.
5. Affordable & Scalable
At ~$130 for the 8GB model, it’s accessible enough to buy multiple units and scale into clusters. This makes it perfect not just for one-off edge AI projects but for experimenting with distributed computing.
Comparison: RPi 5 vs ESP32 vs Jetson Xavier vs LattePanda
| Feature | **Raspberry Pi 5 (8GB)** | **ESP32** | **Jetson Xavier NX** | **LattePanda Alpha/Delta** |
|---|---|---|---|---|
| **CPU** | Quad-core ARM Cortex-A76, 2.4GHz | Dual-core Xtensa LX6, \~240MHz | 6-core Carmel ARMv8.2, 1.9GHz | Intel Core m3 / Celeron |
| **RAM** | 8GB LPDDR4X | \~520KB SRAM | 8–16GB LPDDR4 | 8GB DDR4 |
| **GPU / AI Accel.** | VideoCore VII GPU, supports Coral TPU / Intel NCS2 | None (basic I/O MCU) | 384-core Volta GPU + 48 Tensor Cores | Intel UHD GPU, supports external AI accelerators |
| **Power Draw** | \~10–15W under load | less than 1W | 10–15W idle, up to 30W+ | 6–15W depending on model |
| **OS / Ecosystem** | Full Linux distros (Raspberry Pi OS, Ubuntu, Arch, etc.) | Arduino / ESP-IDF SDK | NVIDIA JetPack (Ubuntu-based) | Windows 10, Linux |
| **Ease of Use** | ⭐⭐⭐⭐☆ (plug-and-play, huge community) | ⭐⭐☆☆☆ (low-level coding, steep curve) | ⭐⭐⭐☆☆ (powerful but complex) | ⭐⭐⭐☆☆ (PC-like, Windows support) |
| **AI Suitability** | Great for edge inference with accelerators (e.g., Coral TPU, TFLite) | Very limited (good for sensors/IoT, not AI) | Excellent for heavy AI models (CV, robotics) | Decent for ML frameworks, but higher cost |
| **Cost** | \~\$130 (8GB) | \~\$5–\$10 | \~\$400–\$600 | \~\$400–\$800 |
| **Best Use Case** | AI at the edge, small clusters, prototyping | IoT, sensors, simple MCU projects | Robotics, computer vision, high-performance AI | Windows/Linux dev, mid-range AI workloads |
- RPi 5 = Best balance of price, performance, and ease of use → ideal for AI edge computing.
- ESP32 = Cheap, ultra-low power → great for IoT, but not for AI.
- Jetson Xavier = AI powerhouse → but expensive, power-hungry, and overkill for most.
- LattePanda = PC replacement vibe → flexible, but pricier and less supported for edge AI.
Closing Thoughts
We may have failed miserably at the hackathon, but the lessons stuck. The ESP32 taught me about constraints. The Jetson Xavier showed me raw performance. But the Raspberry Pi 5 hit the sweet spot—easy to set up, powerful enough for AI at the edge, and backed by a huge ecosystem.
Sometimes failure teaches you where the real wins are hiding.
Day 20 – $4,960 Edging the AI
$130 Hailo-8 (13 TOPS), An Old USB Stick, A Free Screen
Looks like I’m firmly planted in the Raspberry Pi ecosystem for now. With so many libraries and community projects around it, it makes sense—especially when hackathons are increasingly hardware-based and almost always come with an AI angle.
I was really tempted by the newer Hailo-8 26 TOPS accelerator (~$300), but in the end, I went with the 13 TOPS version for $130—much friendlier on my budget.
At first, I imagined just spamming the GPIO pins with random projects. But the more I thought about it, the more I realized: every project has different hardware quirks, sensors, and requirements. What remains consistent is the need for an AI edge node—a device dedicated to running inference quickly, locally, and efficiently. That’s where the Hailo makes sense.
What is AI Edge Computing?
AI edge computing is all about running machine learning models close to where the data is generated. Instead of sending images, sensor data, or video streams up to the cloud for processing, you run inference locally—on a Raspberry Pi, Jetson, or a USB accelerator like the Hailo-8.
Benefits of edge AI:
- Lower Latency – Real-time responses (critical for robotics, autonomous driving, and security).
- Privacy – Data doesn’t need to leave the device.
- Efficiency – Saves bandwidth and reduces reliance on internet connectivity.
In short: edge computing lets AI happen here and now, instead of “out there” in some distant data center.
How Others Use Hailo in Their Homelabs
I’m not alone in experimenting with the Hailo-8. In the homelab and maker communities, people have been getting creative with these little NPUs:
- Smart Security Cameras – Running real-time object detection (people, vehicles, packages) at the edge without sending video to the cloud. Saves bandwidth and adds privacy.
- IoT Gateways – Processing sensor data (temperature, motion, vibration) locally and only forwarding insights instead of raw data.
- Media Servers with AI Features – Adding things like automated face recognition in photo libraries (similar to Synology Moments or Plex AI features) but self-hosted and private.
- Robotics & Drones – Offloading vision tasks (lane detection, obstacle avoidance) to Hailo, freeing the main CPU for navigation and control.
- Cluster Nodes – Some homelabbers slot Hailo sticks into their Raspberry Pi clusters, turning each Pi into an AI-enabled node for distributed inference tasks.
The theme is always the same: speed + privacy + efficiency. Instead of burning GPU cycles or relying on cloud APIs, the Hailo-8 accelerates inference locally, at a fraction of the power draw.
How This Differs From Self-Hosting an AI Model Like Qwen
Of course, there’s a huge difference between running a specialized NPU like Hailo and spinning up a self-hosted model like Qwen on your server.
-
Hailo-8 (Edge AI Inference)
- Purpose-built for narrow AI tasks like image classification, object detection, or speech recognition.
- Runs small to medium pre-trained models (often optimized with ONNX or TensorFlow Lite).
- Extremely efficient: a few watts of power, no giant VRAM requirements.
- Think of it as a toolbox for edge intelligence, not a chatbot brain.
-
Qwen or Other Self-Hosted LLMs
- Large language models that can generate text, answer questions, or do reasoning.
- Require lots of RAM/VRAM (e.g., 7B Qwen model needs 16–32GB system RAM minimum).
- Flexible and general-purpose, but resource-hungry.
- Great for running a local “ChatGPT-like” service, but not suited for real-time sensor or vision tasks.
In short:
- Hailo = the scalpel → efficient, precise, task-specific AI at the edge.
- Qwen (LLM) = the Swiss Army knife → powerful general-purpose AI that eats resources.
For a balanced homelab, many enthusiasts actually use both:
- NPUs like Hailo for fast edge inference (cameras, IoT, robotics).
- Self-hosted LLMs like Qwen for conversational AI or coding assistance.
Together, they cover very different but complementary domains of AI.
The Hailo Series
Hailo is an Israeli company specializing in AI accelerators—compact chips that deliver massive inference performance at very low power. Their USB and M.2 modules are designed for edge devices like Raspberry Pi, industrial PCs, and embedded systems.
- Hailo-8 (13 TOPS) – Entry-level, USB-stick form factor, great for small projects and prototyping.
- Hailo-8 (26 TOPS) – Higher performance variant, better for heavier models or real-time video AI.
- Hailo-15 – Newer generation SoC with integrated AI acceleration + image signal processing.
What makes Hailo special is its balance: low cost, low power draw, and optimized software libraries, making it easy to integrate into edge devices.
NPU, TPU, CUDA, and VRAM – How It All Fits
There’s a whole alphabet soup of terms when it comes to AI hardware. Let’s break them down:
-
NPU (Neural Processing Unit)
- A processor specialized for running neural networks.
- Found in accelerators like Hailo or mobile chips (e.g., Apple Neural Engine, Qualcomm Hexagon).
- Optimized for matrix multiplications, which are at the heart of deep learning.
-
TPU (Tensor Processing Unit)
- Google’s version of an NPU.
- Designed specifically for TensorFlow and large-scale inference/training.
- Available as cloud TPUs, or small edge TPUs (like the Google Coral USB Stick).
-
CUDA
- Not hardware, but NVIDIA’s programming framework that allows developers to run parallel computing workloads on GPUs.
- Enables deep learning libraries (like PyTorch or TensorFlow) to take advantage of NVIDIA GPUs.
-
VRAM (Video RAM)
- The dedicated memory on a GPU.
- Determines how large your models and datasets can be loaded at once.
- More VRAM = the ability to handle bigger models (e.g., 12GB VRAM can fit a decent-sized LLM, while 2GB struggles).
Bringing It Together
When you put this all together:
- Raspberry Pi 5 = the general-purpose controller, running Linux, managing apps, sensors, and networking.
- Hailo-8 NPU = the specialized accelerator that runs AI inference at the edge efficiently.
- CUDA GPUs (if in a bigger setup) = handle training or heavier compute tasks in a more flexible but power-hungry way.
- VRAM = the fuel tank that decides how big your AI models can be.
In my setup, the Hailo-8 is the edge enabler. It gives me the ability to run AI models faster than the Pi 5 could alone, while staying compact, efficient, and hackathon-ready.
Closing Thoughts
Sometimes, the best investment isn’t in raw power, but in modularity and balance. By adding a Hailo-8 to my Raspberry Pi ecosystem, I now have an AI edge node that’s portable, efficient, and flexible enough for whatever the next hackathon throws at me.
It’s not just about having more TOPS—it’s about having the right tools at the right edge.
Day 21 – $5,000 Rpi 5 Kit
Decided to upgrade my RPI a bit, 10 Rechargable Batteries - $5 Rpi Touchscreen 3.5 inch - $15 Micro sd sandisk 2tb -$5 GPIO Header Kit - $2.50 Mini Hdmi to Hdmi adapter - $2.50 Breadboard Kit - $2 GPIO to usb adapter - $2 Lenovo micro sd 2tb - $6
Day 22 – $5,220 Rpi 5 Tools
Cooling Hat + GPS + UPS - $100 Af imx519 16mp Camera - $32 Passive FM receiver - $16 SIM card emulator - $10 58 AWUS036ACM Passive Wifi Reciever - $62
Day 23 – $5,250 Another Switch Up
4port 2.5gb 2port 10gb SFP+ Switch - $30
Day 24 – $5,500 3D printer
Bambu A1 Mini + White PLA - $250
Day 25 – $5,500 What works and what don't, RPI
Day 26 – $8,000 2.5k PC build for My NS friend
Windows 11 Pro - $10 2tb Lexar Nm620 - $250 Corsair SF1000L PSU - $230 27" APEX monitor - $110 Lian Li o11 Dyanamic - $130 Thermalright Peerless Assassin 120e - $40 RTX 5060ti 16gb - $540 2 * 32gb crucial CT32G48C40u5 - $500 Asrock B650M Pro RS WIFI + Ryzen 5 7600 - $500
Day 27 – $8,000 Some troubleshooting
Day 28 – $8,100 Small add ons
VIHALS bedside table - $60 Portable Monitor - $40
Day 29 – $8,600 Sound System
Vinnfier Hyperbar 800 BTR - $500
Day 30 – $10,000
Gskill trident 4 * 8gb DDR4 - $278 Gigabyte Z270-PHOENIX GAMING Motherboard - $120 MBOX nemesis 550w - $20 i7 7700t - $100 Seagate 1tb - $30 - 3 mirror dell wyse - $40 Mic + camera - $40 Asus ac3000 triband - $32 aimesh offload Sata Cables - $6 Sata to nvme 6 ports - $20 M.2 nvme 128gb - $6 Beelink Ser9 - $700
Back to blogs